ANIMALS & BIRDS
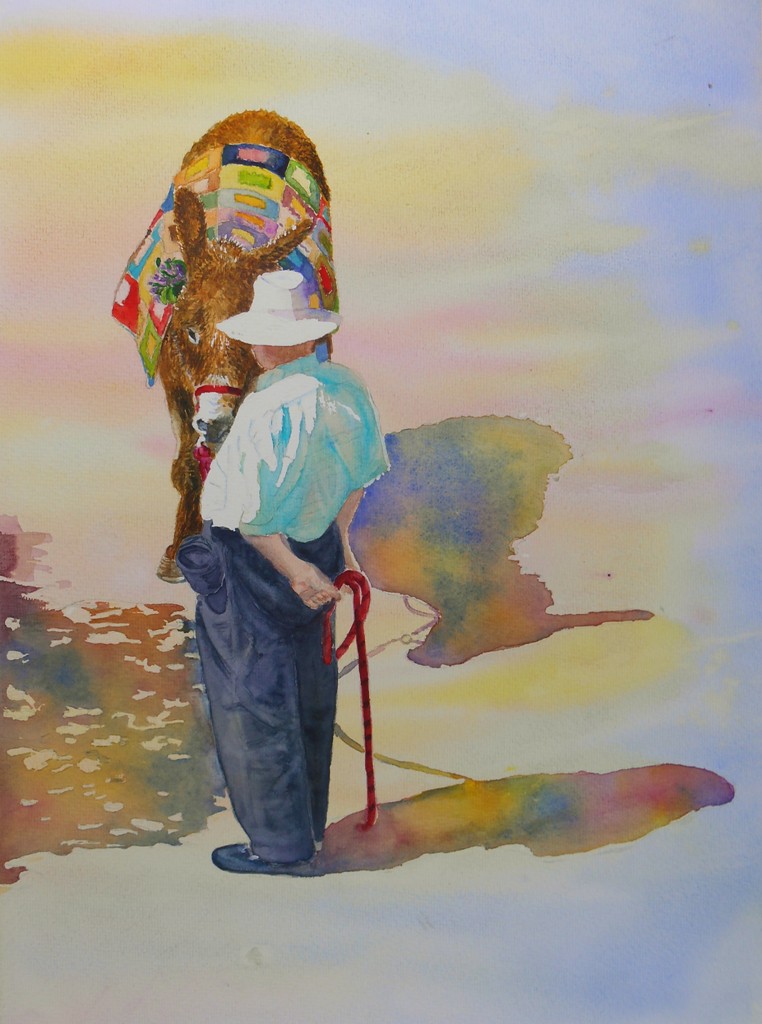
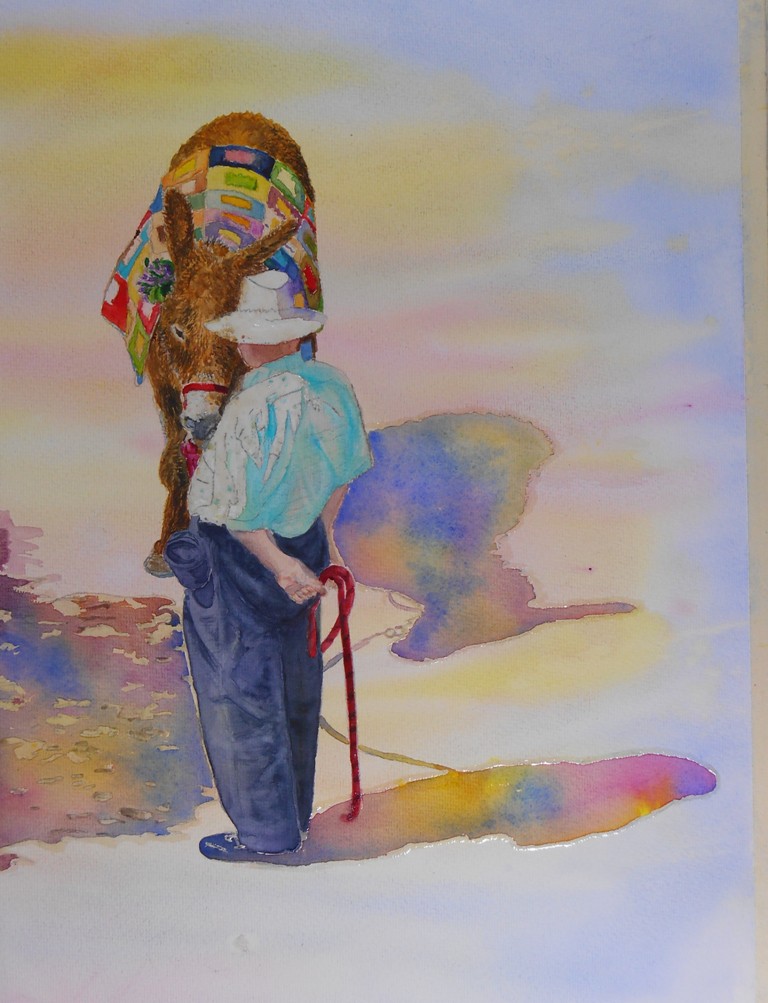
A DONKEY CALLED MIRANDA- Watercolour animal tutorial step by step
This picture is my homage to all the donkeys of the world, that are working winter and summer under most of the time very hard conditions. Some few of them have a good life, but these are exceptions. Lucky, also are the ones that get a place in a donkey sanctuary If you like donkeys you may decide to make a donation and support them or to buy my original painting. 50% of the revenue goes to a donkey sanctuary of your choice.
Let's get started
MATERIALS :
If you do not have the colours of the list, feel free to use any other colour you may find convenient. As an orientation, you may have a look at the colour composition — usually this at the side of the tube or label pan.
PAPER:
- 300 grams watercolour Rough 40 x 50 cm approx. Size: ca. 39 x 53 cm (20,86” x 15,35”). Watercolour painted on 300 grams Cold pressed paper.
COLOURS:
- Winsor Yellow, Raw Sienna, Quinacridone Magenta, Sepia, Cobalt Turquoise, Cerulean Blue, Ultramarine Blue, Paynes Grey.
BRUSHES:
- 100 mm or larger flat brush to wet the paper.
- 22 or larger, round or flat (both will work), to apply the first washes.
- 1 & 6 round, good pointed brushes.
- 6 cheap synthetic brush or wooden stick to apply the masking fluid.
OTHER MATERIALS:
- Masking fluid.
- Kitchen paper of tissues.
- Transparent paper.
- Saral transfer paper.
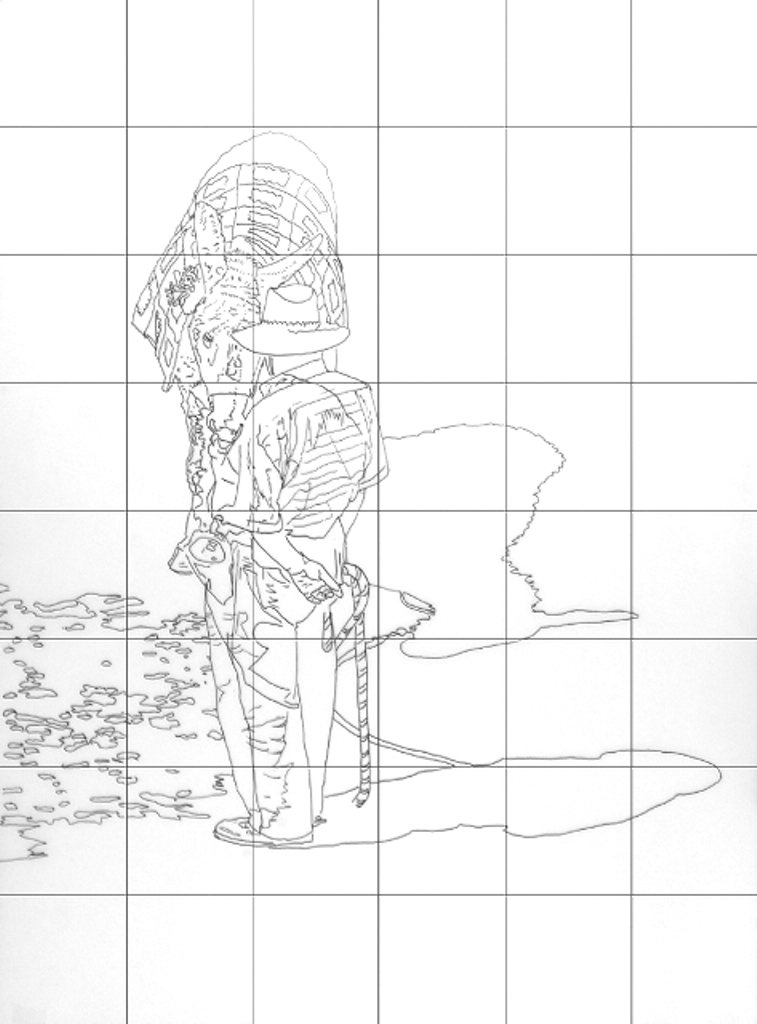
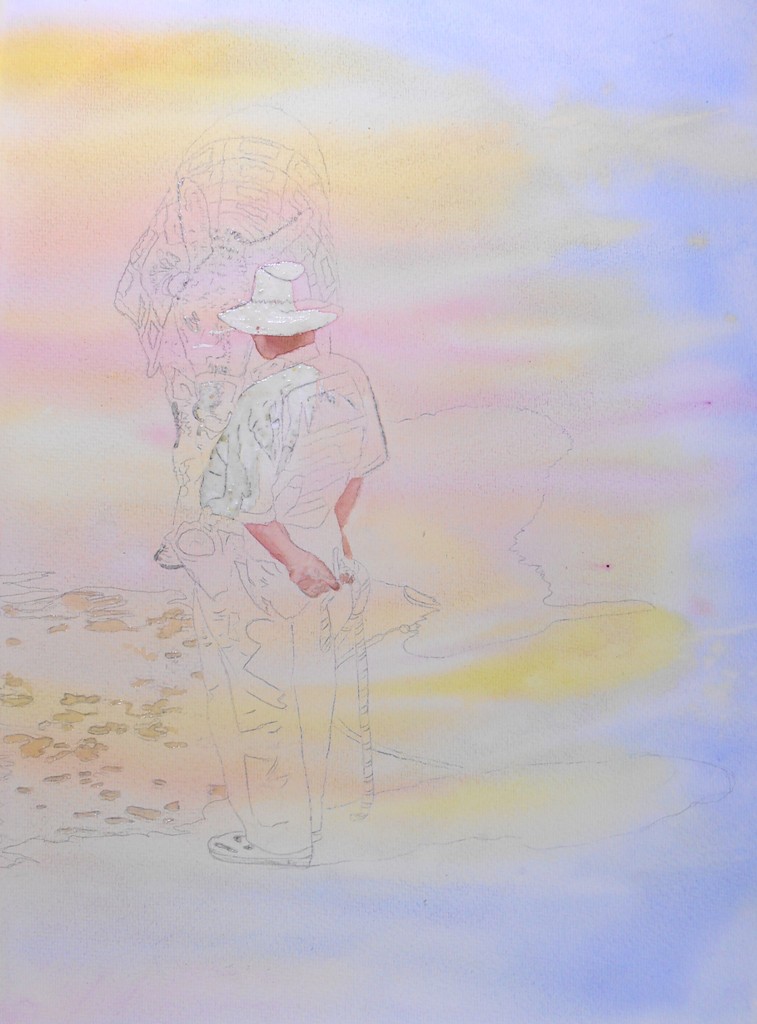
STEP 1:
- Copy the drawing and transfer it onto your watercolour paper.
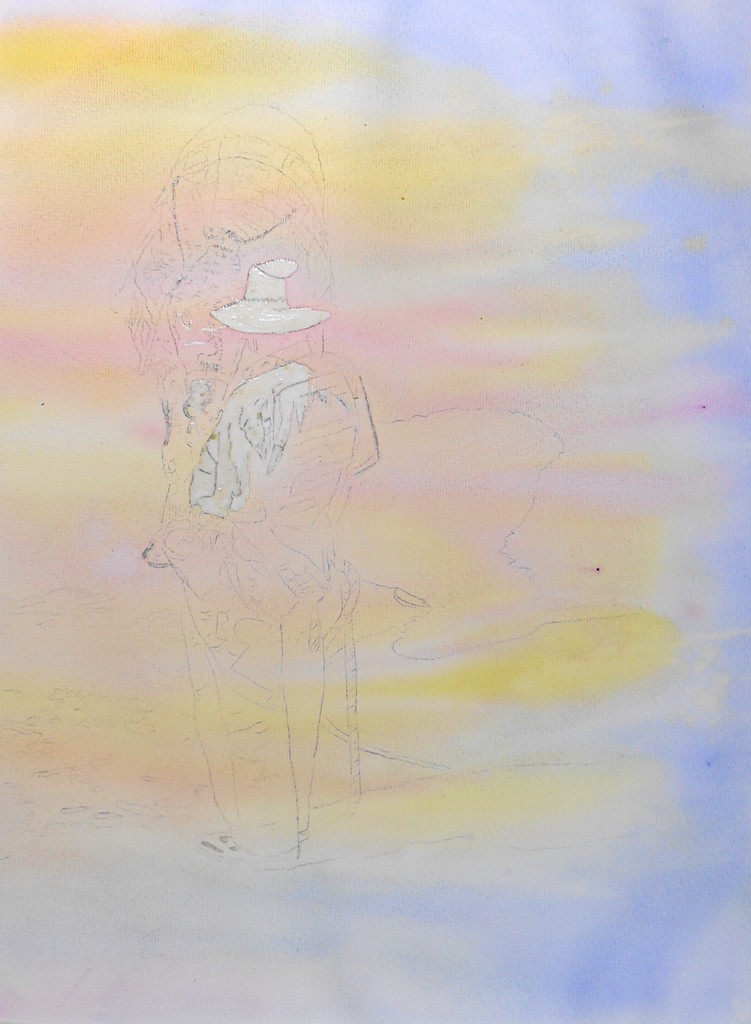
STEP 2:
- Mask all the light and white areas, as shown in the photo, and let it dry.

STEP 3:
- Wet the entire paper and apply Winsor Yellow then Quinacrinode Magenta and then Ultramarine Blue wet on wet. Move the paper slightly so that the colour mix and then turn the paper through 90 degrees, as shown in the photos, and then tilt it so that the colours run down the paper. Allow the paper to dry in that position without moving it.
TIP: Lift out the colour of the water that collects at the bottom edge of the paper or cauliflowers may form.
STEP 4:
- If your pencil lines have faded a little with the wash, then draw them again
- Mask the light spaces in the shadows on the left side of the paper.
- While the masking fluid is drying, paint the face and arms of the man with a mixture of Quinacridone Magenta and Burnt Sienna.
STEP 5:
- Paint the first wash on the body of the donkey with Raw Sienna and drop into the shadow side a little Burnt Sienna to indicate hairs on the donkey, and then Sepia on the shadow side of the face.
- Also, start painting the blanket with any colours that you like, but not white.
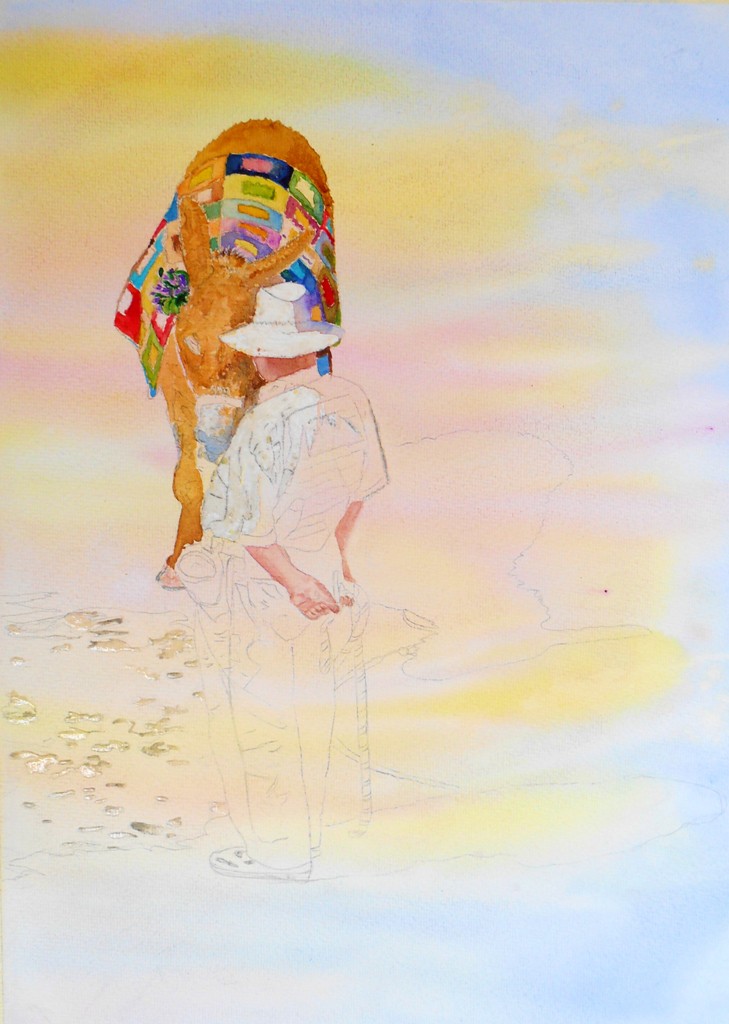
STEP 6:
- Paint the shirt with Cobalt Turquoise or Cerulean Blue. You may use any blue that you wish. It depends a little on the colours of your under wash. Make a small test on a separate piece of paper and see what fits best.
- Now, paint the trousers with a mix of Paynes Grey with Quinacrinode Magenta and Ultramarine Blue. Use a flat brush to lift out some colour and taking care to paint the fronts side lighter than the backside of the legs.
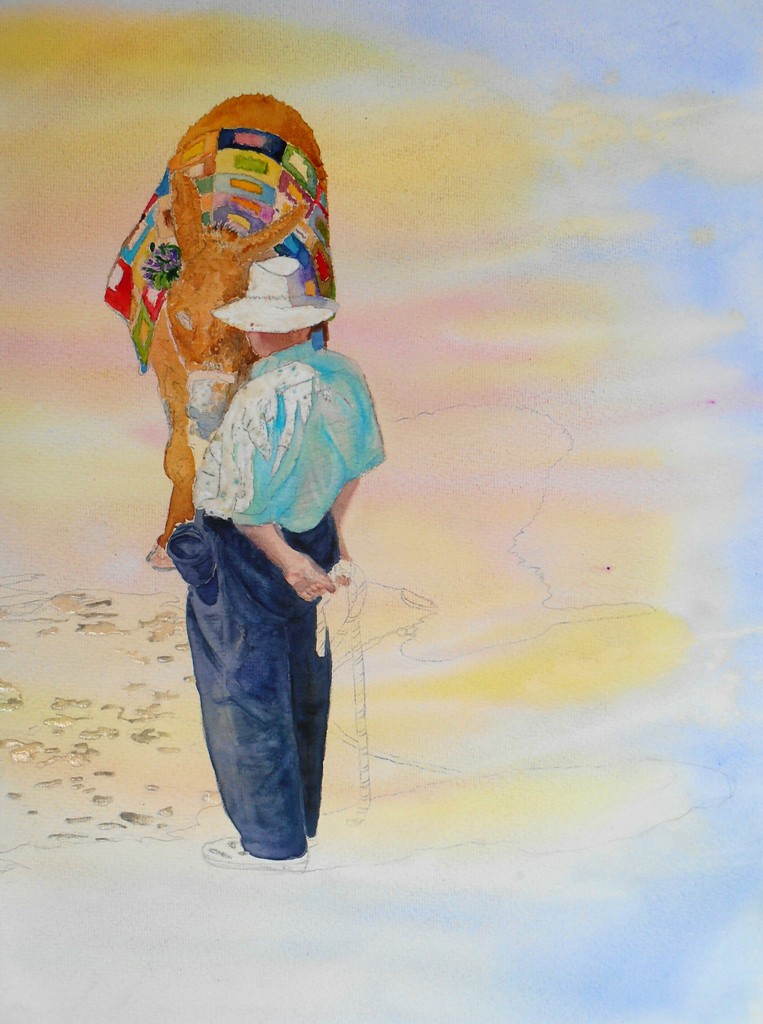
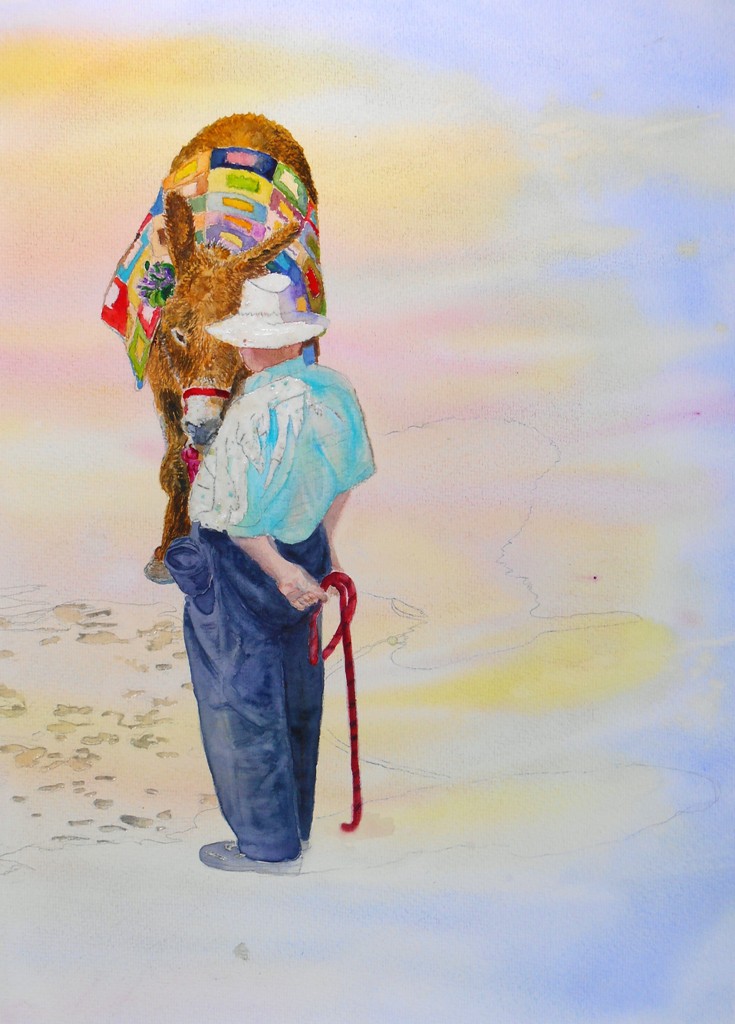
STEP 7:
- With the No. 1 brush paint the dark details of the body of the donkey with Raw Sienna, Sepia and Ultramarine Blue and follow the direction of the hairs but without being too detailed.
- Paint the bridle on the donkey and the rope behind the man, first with Magenta and then Winsor Red. Paint the shadows on the donkey and the lines on the rope with Ultramarine Blue.
- Paint the shoes with a pale Paynes grey and soften them back.
- Allow it to dry completely.
STEP 8:
- Mask all the edges around the shadow areas. Let it dry.

STEP 9:
- Wet the two shadow areas behind the man and the donkey and drop in yellow, Quinacrinode Magenta and Ultramarine Blue. Then move the paper and allow the colours to mix and blend into each other, taking care not to let the colours run outside the shapes. Let it dry.
- Wet the shadow on the left and repeat as above. Let it dry.
- Check the values of shadows now. If you find them too dark add a wash of yellow (Transparent Yellow) if they are too light then add a wash of Ultramarine Blue. Let it dry.
STEP 10:
- Remove the masking fluid.

STEP 11:
- Check the final details and soften any hard edges with clean water and a hard flat synthetic brush.
- Make a last check. FINISHED!